I know a few people have asked me over time to publish a hair tutorial and I finally got around to working on one to post. Now I don't think one tutorial can cover the various elements on different hair styles and techniques to use, but this will be a start to show some fundamentals.
**This whole guide was done in Photoshop Cs3 and with a USB Mouse only.
It's a simple guide, which should help getting started with hair edits.
So my first model for this is Yasamuu. The style for this hair cut it a spikey one which is slicked back.
Step 1
We start off with the image, try to get the shot so the hair/head is in front of a clear sky/background which enables easier editing overall.
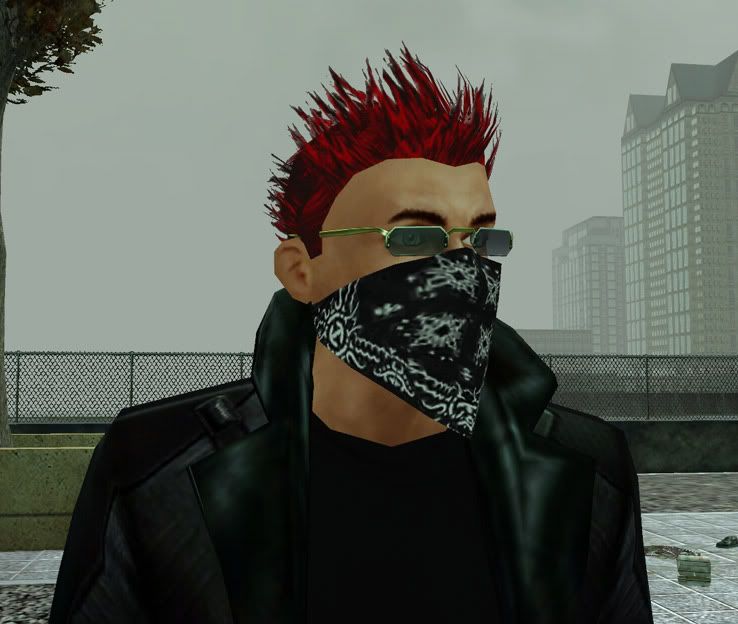
Step 2
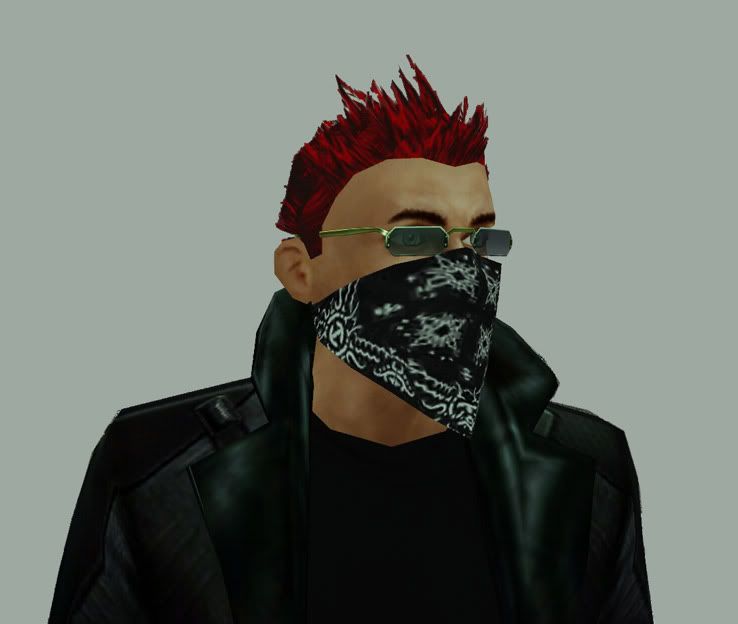
Using the channels I make my cutout for the image (probally make a guide for that later), that way you can quickly clean up what is not needed and be able to remove the background with ease.
You will notice I cut off the hair, that is because the majority of hair shots ingame are so weak that using them is only going to make editing the style less flexible. I will use the style as a "guide" to the overall shape I want the hair to take.
Step 3
First thing I'll do is get my base color for the hair, in this case it's red. Next you need to start brushing in the base of the hair.
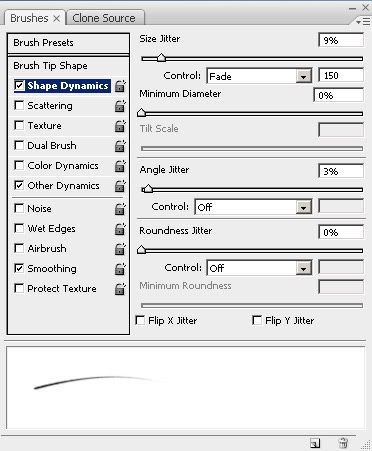
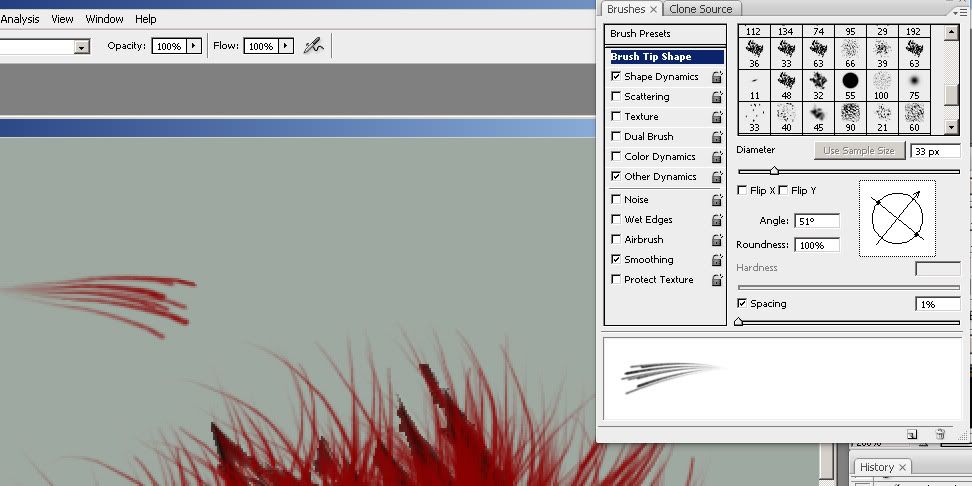
As shown below use the brush options, apply shape dynamics and control: Fade. This is the key to the full edit, you also adjust the size of the fade based on the hair you are painting in and where it is placed.
Step 4
Now I start to mark in the hair strands very quickly, and the fade will control the edges for me, I just need to pick the start point and drag the brush into the desired shape.
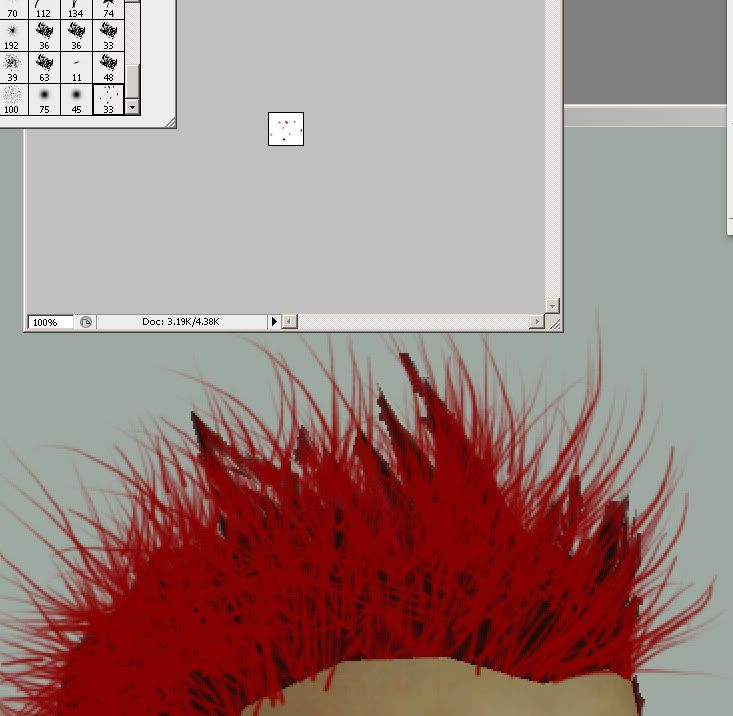
Once you get your basic lines in place, make yourself a new brush. I make random dots on a new image, say a 50*50 box. Edit > Define Brush preset once you have that done, then follow the next part.
Step 5
Using the Brush options > Shape dynamics I add the fade to this brush, you might need to adjust the angle to make sure it shapes correctly.
On the image I painted in to show how the brush is working. You then use this bigger brush to add to the hair shape you have been forming.
Step 6
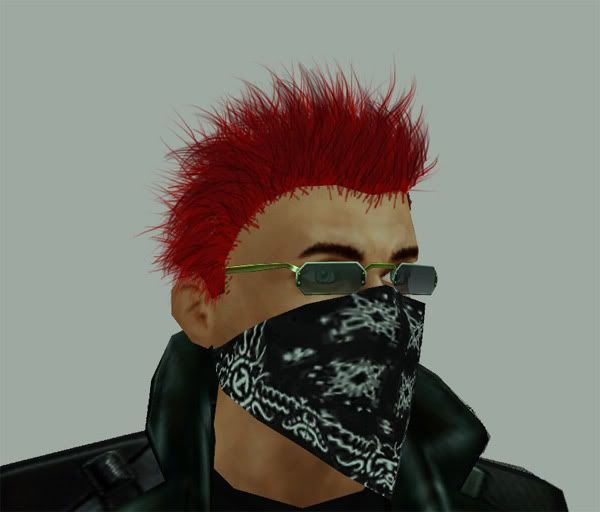
Using this new brush I define in more hair strands quickly and since the hair will have different shades of red I change the color in different parts and keep defining the shape in. Don't worry about being 100% correct at this point, you just need to get the basics of the shape in place.
As you can see I've been mapping into the way the hair will be flowing and how the front will be sticking out more.
Step 7
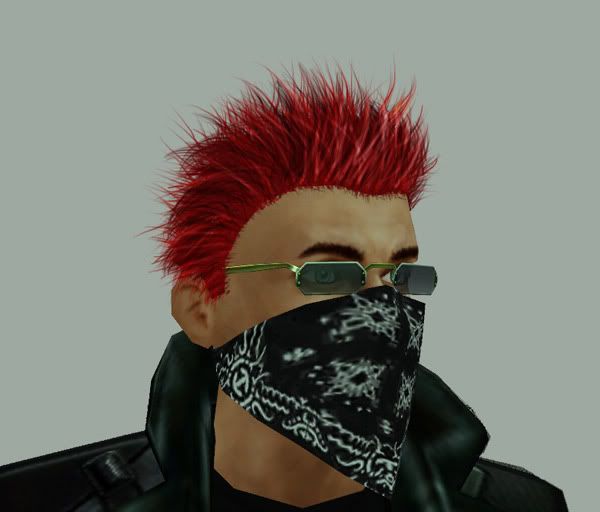
This is the part where you start to change a 2D hair style into 3D. I've done this part by painting in the strands and shadows I need, but in this tutorial I went with using the dodge and burn tools.
Using the same dynamic options as the brushes you apply the fade control to both dodge (highlights) and burn (shadows) when used.
*Note that the entire layer of hair is just 1 layer, not multiple layers, so this part effects it all.
So you apply the shadows and highlights where needed to show depth and light into the hair style. When using the tools on that hair layer work from the outside > in, so the "fade" hits the inside of the hair and gives a natural effect to it and doesn't leave hard edges.
Step 8
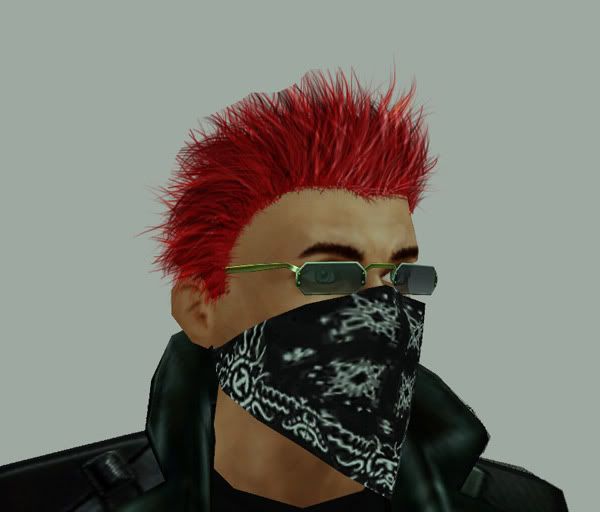
Now that the hair has the definition I want, it's time to begin the clean up. Using the lasso tool I cut away where I think the hair is too long or doesn't fit the shape I wanted to make.
Step 9
Now we need to clean up those rough edges and a soft brush with an opacity of about 20% is enough to bring those hard edges into the fade.
Then I go back to the earlier steps of brush strokes and start to fill in hair where needed and re-work dodge/burn to fit into the hairstyle better. I also use a smaller fade on the brush to add hair coming out of the "shadow" sections to show more depth and style to it.
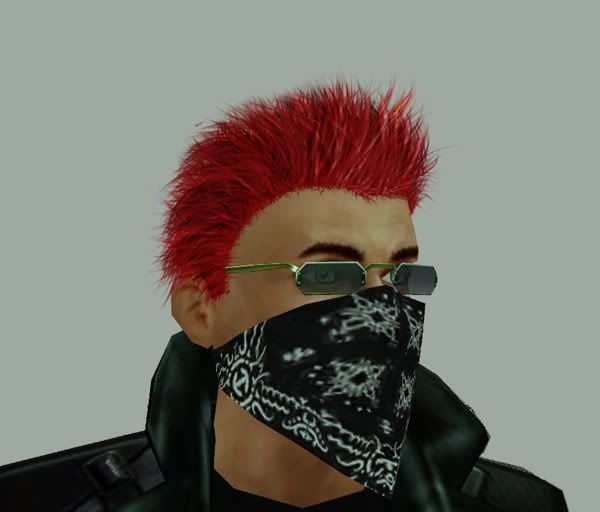
Step 10
Once your happy with the clean up you can add a few extra things like correct shadows of the hair on the skin. Just brush in the shadow on a layer below the hair, apply some gaussion blur and opacity fade to it.
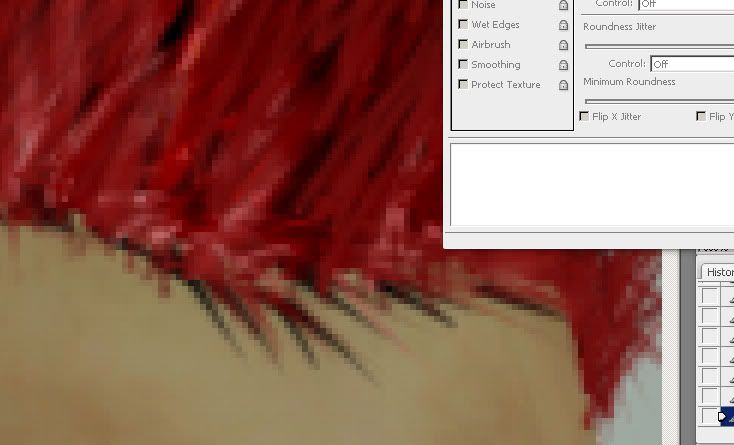
Step 11
I finish up with a bit more cleaning, and use the hue/saturation I modify the overall color a bit darker.
Now please not the ONLY difference between the 2 pictures is the hair, normally when doing a full edit I'd be working on the skin/background/clothes etc to help each area work to compliment each other, as a edit on 1 part is never just enough.
There is more tweaking that could be done to this hair, but I think this tutorial covers enough for people to get started on ideas themselves.
Final Edit Compare
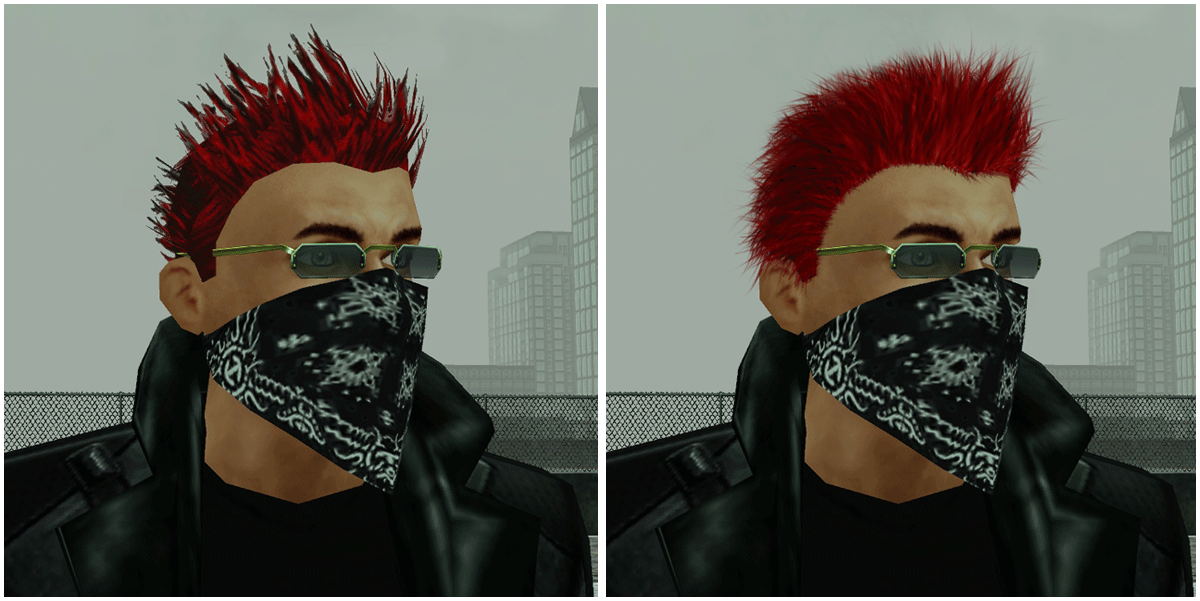
If you have any questions or want anything explained in more detail here, please just post away.
As stated this is the first guide for a few I plan on doing to show various styles and how I would tackle them. I'll also try to add more about actual highlights/shadows for different light situations as hair directly reflects the area around it.
Hope this guide has helped some people. I'm always on a learning curve myself, so there is always more things to use/add to guides like this.

